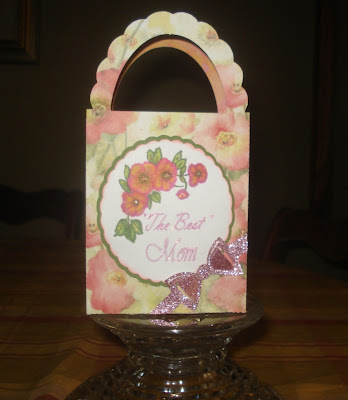
I have been asked by a few to explain what a SketchKut is.. so I will give you a general answer as a video is in the process for you. I made this gift bag using BossKut digital cut patterns: Scallop handle bag - BKD005, PANSY Digi Stamp SketchKut, a PopKut straight bow I designed and Pink Glitter paper. You can find patterns for purchase at: http://www.bosskutdiecuts.com/sketchkuts.aspx
What makes the SketchKuts different from other digital stamps you asked. Not only do you get a JPG colored and plain B/W, you get a WPC file you can change the sizes as needed, cut with your Gazelle and use your pens or markers! I took a few pictures of the process making my bag today.
FIRST:
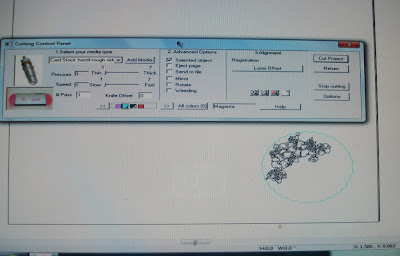
I opened my bag file and SketchKut file in my Funtime program. I decided to add a different sentiment and resize the pansies. Also be sure to lay the SketchKut over the bag to size it accordingly before cutting. I have my Sketchkut pattern on the bottom of my cutting area and bag on the top part. Now I check the selected object feature and only my SketchKut will show and cut until I unselect the feature. Look on the upper middle part of the picture where I have my arrow pointed. Using this feature saves you a lot of time and miscuts. I am going to use a regular ink pen to draw my design first. I ALWAYS change my force to 1 and Knife Offset to a 0 before using the pen feature.

What makes the SketchKuts different from other digital stamps you asked. Not only do you get a JPG colored and plain B/W, you get a WPC file you can change the sizes as needed, cut with your Gazelle and use your pens or markers! I took a few pictures of the process making my bag today.

FIRST:
I opened my bag file and SketchKut file in my Funtime program. I decided to add a different sentiment and resize the pansies. Also be sure to lay the SketchKut over the bag to size it accordingly before cutting. I have my Sketchkut pattern on the bottom of my cutting area and bag on the top part. Now I check the selected object feature and only my SketchKut will show and cut until I unselect the feature. Look on the upper middle part of the picture where I have my arrow pointed. Using this feature saves you a lot of time and miscuts. I am going to use a regular ink pen to draw my design first. I ALWAYS change my force to 1 and Knife Offset to a 0 before using the pen feature.

I am now ready to draw the design. YOU DO NOT need a special pen holder!!! Just take out the blade and insert the pen.
I wanted to use 2 different color pens so I first changed the outline colors. This isn't necessary if you use the pattern as is. I then put my blade back in the holder and my Gazelle cut the scallop frame.
Next I highlight my bag pattern, select the selected object again and cut my bag.
I then colored in my Pansies, used my glue pen to trace the sentiment and added glitter.


