Monday, December 5, 2011

Bosskut & Scrapmart Holiday Blog Hop Day 3

                                                   Chalkboard Vinyl  Craft Box
                                                     By Judy Stark  Bosskut Design Team


Some projects are just too much fun some days than others.  This is one of those projects!  My almost 5 year old Grandson (Cash) loves to craft and I made this for him as a gift.  I used a 10 inch by 8 inch cigar box and covered it with cardstock.  The cardstock I used is heavy 100 wgt already coated.  I cut my top, sides, strips, tag, title and monkey using my Gazelle.  I used the Bosskut Monkey available at http://www.bosskutdiecuts.com/monkey.aspx and glitter paper from http://www.bosskut.com/ .  The knobs are from a local hardware store.


Now to the inside.  I used the heavy wgt chalkboard vinyl available at Bosskut (by the sheet)
http://www.bosskut.com/chalkboardvinyl.aspx  12 by 24 inch sheet for $ 5.99.  You can do a lot of projects with this size and this IS NOT the thin weight chalkboard vinyl! 


 I measured and cut the chalkboard area with my Gazelle.  The vinyl is self adhesive, by the way.  Framed around it in ribbon and done!  I made the chalk case and little goodie bag with his picture, using the print and cut feature on my Gazelle.  I am sure Cash will cherish this for years.


                                                     Faith Pine Cones Frame
  by Lori m.   Bosskut Design Team


Using one 12x12 frame, some  black vinyl from www.bosskut.com, one very pretty 12x12 paper from K &Company, one Faith quote and another finished gift. 
The Pine cone file is by Judy Stark, available at http://www.bosskutdiecuts.com/pineconeandleavesbyjudystark.aspx


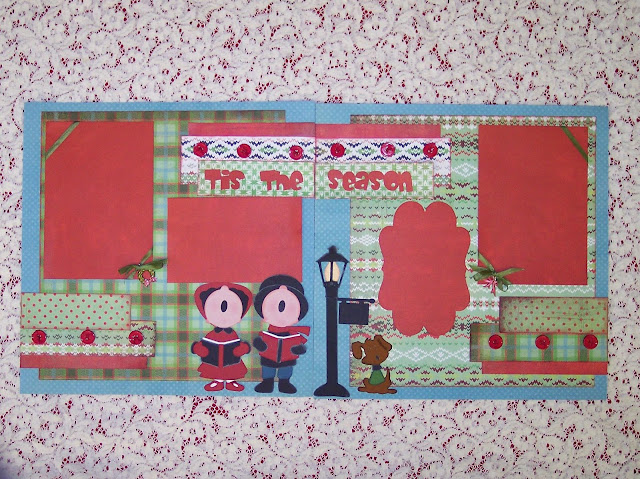
THE CAROLERS LAYOUT
by Debbie Grommet - Bosskut Design Team
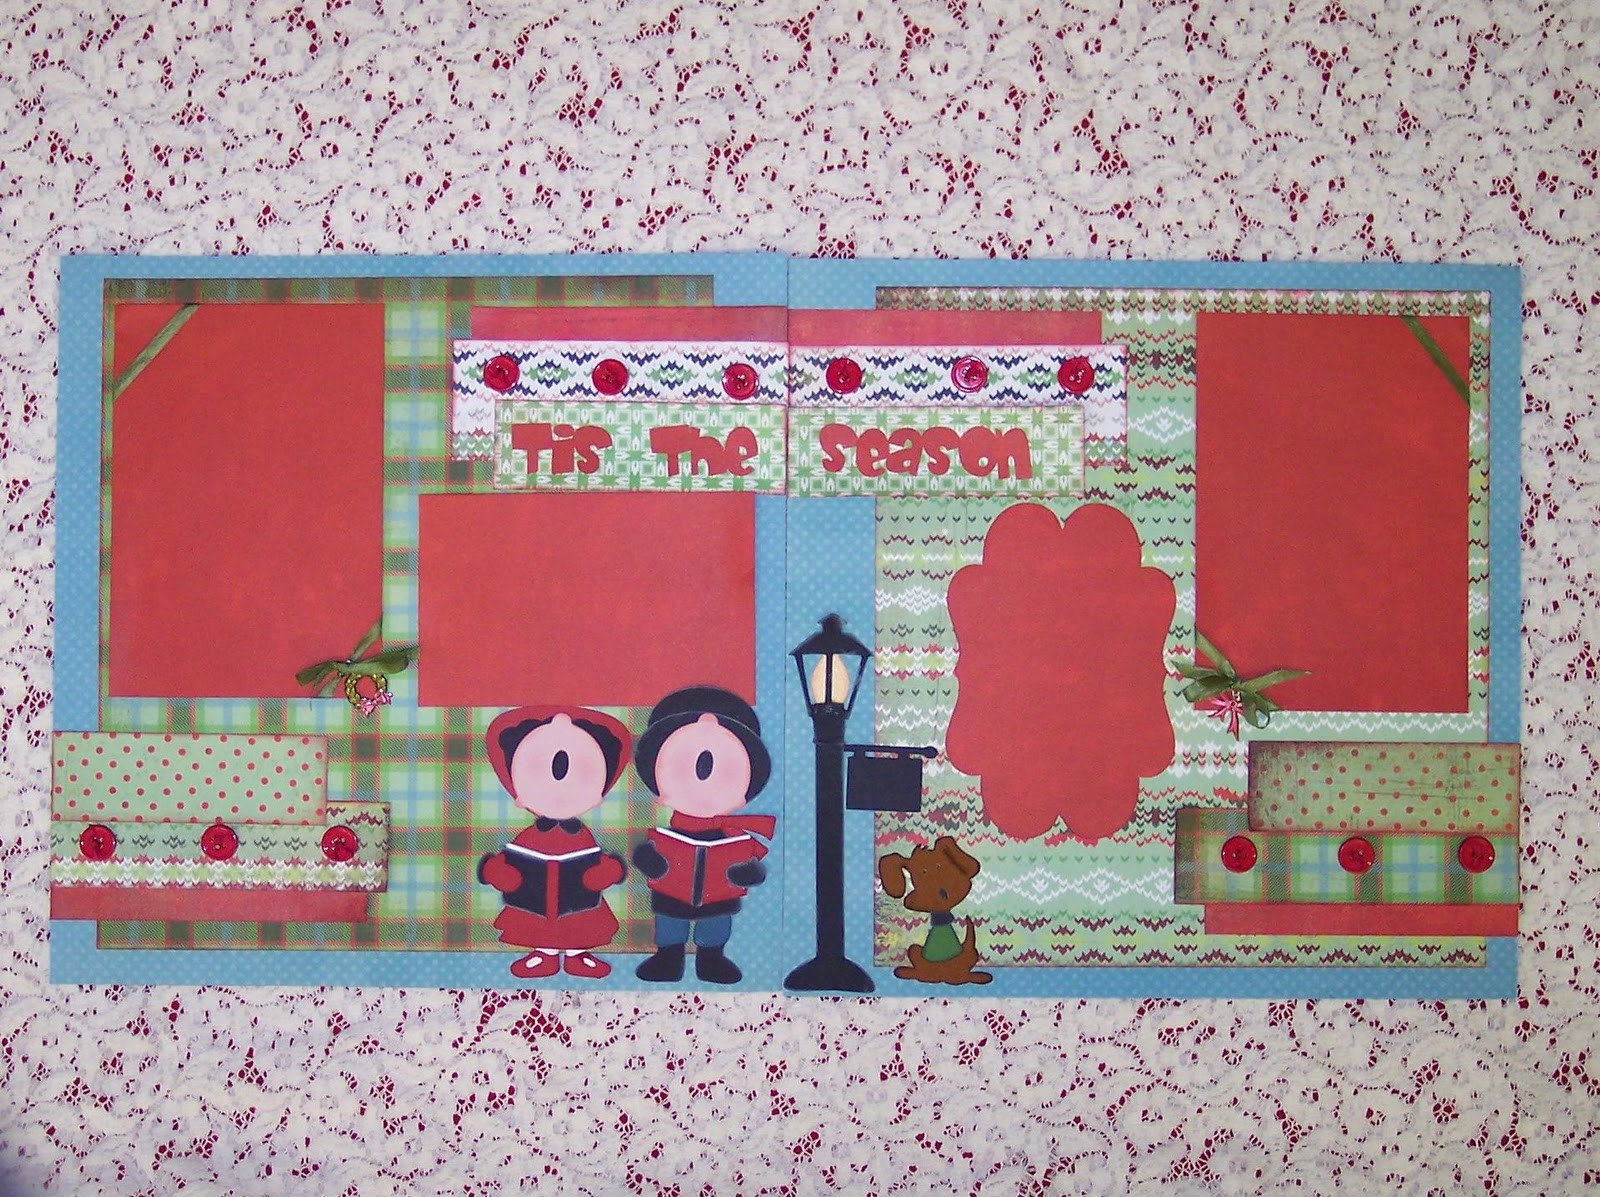

       
  I did this layout using my Gazelle to cut the die cut patterns, frames and title. If you haven't been to the digital diecut store, here is a link : http://www.bosskutdiecuts.com/christmas.aspx
                                      
                                           Floating Snowflakes Card
                                                by Linn Cole    Bosskut Team  


I decided that I would make "pretend snow fall" since I live in East Tennessee and don't get much snow (that's fine by me)  I love pretend snow though!!  I used Green Card Stock for the card, some clear acetate for the spiral that holds the snowflakes and the New Christmas and Winter Diecuts Snowflake #2. www.bosskutdiecuts.com   I used glue dots to adhere the snowflakes onto the acetate spiral, but 1st you want to cut a circle about 3" diameter then cut a spiral out of it.  Use heavy doubled sided tape to adhere it in the place you want it inside the card.  Before adhering it make sure when you close the card the snowflakes don't stick out!  Glue both ends of spiral down and glue as many snowflakes as you wish on different places on the spiral.  When you open it the Snowflakes will look like they are falling!  Love it...  On the front I added 3 more snowflakes with a rhinestone in red in the center of each snowflake.  I also used a White Gel Pen in place of the Blade Holder and wrote on the inside and outside of my card!  You can get the supplies for this card at http://www.bosskut.com/   As long as it's snowing from my cards I LOVE IT!  This is a fun project and doesn't take alot of time!  Enjoy... 
Happy crafting,

                                                   
                                       Etched Personalized Home Decor
                             By Katie Piotrowski   Bosskut Design Team
                                                           

Are you looking for a fast, easy and inexpensive gift?!  Aren't we all.  ;)  My husband and I don't usually exchange gifts but we just had our first set of professional family photos done and we are working on making a collage of those pictures for our foyer.  I had seen etched glass frames and knew it was just what I needed to bring my photo collage together.
Glass etching may sound daunting but trust me, it really is easy!  And your Gazelle does all, well almost all, of the work for you!  I set my project size to the size of the glass insert for the frame, 8x10.  Then, I chose my font and entered my text for the monogram and centered it where I wanted it.  Then, I chose a second script font and entered the 'est.' and year and adjusted it's placement.  Be sure you are using a vinyl blade when working with the vinyl.  You don't want jagged edges or tears...especially when using it for glass etching.  After changing out my blade, I loaded my vinyl on my mat and cut it out.  So easy!  It doesn't matter what color vinyl you choose because you're just using it as a tool this time.  Scraps work great for this type of project.  After cutting the vinyl, I had to "weed" out the parts I didn't need.  In this case, I wanted the negative so I weeded out the actual letters.  Here's what it looked like when I was done...
The next step is to get the vinyl onto my glass.  The easiest way to accomplish this is to use transfer paper.  When you're adhering the transfer paper to your vinyl, be sure you are burnishing it good all the way around so you don't have any bubbles or gaps.  Then gently pull the transfer paper toward you, starting from the farthest corner, ensuring you're getting all the vinyl as you go.  Here's what it should look like...

Now you're ready to apply the vinyl to the glass.  Now, I cut my vinyl piece to 8x10 as well so I wouldn't have to worry about centering it on the glass.  So I started by setting the vinyl along the very top edge of the glass, making sure my corners matched up perfectly.  As I laid the vinyl, I burnished it as I went, like using a squeegee on your car windows then carefully removed the transfer paper, ensuring I didn't pick up any of the small pieces that fill my letters.  I applied the Etch All Cream according to the directions on the bottle, waited about 15 or so minutes, rinsed and removed the vinyl.  That's it!! 
This would be a great project for a childs room, a perfect wedding gift or an easy accent for your own home decor!  Katie


Snowflake Coasters
by Phyllis Parkins


Coasters are a quick and easy gift and always something you can not have too many of.  I make a few sets of these each year just to have on hand for a last minute gift.
I save coasters from restaurants when we go out.  Sometimes if you ask  they will just give you a stack or sell them.  The beer distributors will give them to you too.  So I have a nice stash.
First I trace around the coaster to get my size then scan it into Gazelle software and trace it with the magic wand to get my cuts lines.  If you don’t have a cutter you can always do this by hand.  Next I pick my papers and then cut two for each coaster.  Next step is to attach the cut paper to your coasters. I usually just coat the coaster with matt modge podge and also the paper and then put together. Be sure to really smooth down the paper so you dont get bubbles and that the paper is flat and smooth.  If it is easier for you, you can apply alittle tape runner or glue to the to the coaster to hold your paper down while you modge podge them.
I have already cut my embellishments or made my paper piecings and words before I start assembling anything.  After I get the paper attached and let it dry then I apply my decorations. I usually put a spot of glue on them to keep them in the position I want and then after they are all applied then I give the whole coaster top another coat of modge podge.  I use a foam brush for all my modge podge work.  Let dry and I usually add a couple of more coats just to be sure everything is sealed. I go around the edges too to make them water proof.  Let dry really well then coat the back of your coaster with 2- 3 coats of modge podge.

This picture was enlarged so you can see the detailI used my new snow flake digital diecut for this years coasters. I cut them out of glitter paper and wanted to show you how detailed our Gazelle can cut. The small snowflake is only 2.75″ tall and wide. Notice how smoothly these cut.
                 
These Coasters were covered with some old holiday paper (great way to use up scraps), and I used some of our Boss Kut dies for the embellishments and the words are some of Boss Kut’s expressable dies. I assembled the embellishments before I added them to the coasters. You could use card stock stickers or even rub – ons .  To give as a gift I just stack them all and tie with a pretty ribbon and add a handmade tag.  These make great teacher gifts.
Supplies:
Dies available at www.bosskut.com
Digital die cuts available at www.bosskutdiecuts.com
Scraps of medium weight scrapbook papers
Modge Podge available at Walmart or craft store

Sunday, December 4, 2011

HAPPY HOLIDAYS from BOSSKUT - Scrap-Mart 2nd Annual Blog Hop Day 2


                                           NINE BLOCK WALL QUILT
                                                                  By Ruthanne Tucker
                                                                     Guest Designer                                           

    I am new to quilting and made a simple nine block wall quilt and I thought I would really test the BossKut Gazelle and see if it can cut out these delicate snowflakes from fabric and without any problems, the Gazelle cut out the most beautiful snowflakes I’d ever seen! and I was able to fuse them to the top of my wall quilt. Snowflake patterns available at www.bosskutdiecuts.com   
 I have to say I’m very impressed on how the BossKut Gazelle cut out the snowflakes. Each delicate piece looked like I worked very hard, when the truth is, I didn’t.

Ruthanne Tucker
http://www.tuckerstreasures.com


  POINSETTIA WREATH

                                                           By Linn Cole
                                                           Bosskut Design Team                                                       
                                                  

I made this cute wreath for my front door using the Bosskut Pointsettia Digital Die Cut(you can download it from this website www.bosskutdiecuts.com/christmas.aspx   Also, I made the 12 inch circle on the Gazelle then used 2 colors of green and two colors of red for the pointsettias and glued them to the cut out circle.
  I also used some 2 inch wire ribbon that I just happened to find that has Pointsettia's on it and placed the big bow at the bottom of the Wreath.  I started by cutting the 1st Pointsettia at 4.5" and then did 2 more that were 3.5" then I did 6 more at 3" each.  I then sprayed them with Shimmer Mist and placed rhinestones in the center of each flower! 


                                                 IRON ON VINYL GLAM T-SHIRTS
                                                  By Lori m.                                    
                                                               Bosskut Design Team

                                          
Want  a little Holiday Glamour?  Why not make some pretty tops to wear, a little shiny vinyl, a few rhinestones and some amazing bosskut diecuts, cut with a Gazelle die cutter of course.This adorable design is one of the new files, from Bosskut’s designer Judy Stark.


Here’s a few that I started for my Holiday attire, then I’ll be making some gifts for other people to enjoy.For those days you just want to relax but look pulled together, here’s a twist for a sweatshirt.  I used, glitter heat vinyl, with Rhinestones and did my outline in fabric paint for a little whimsical touch  http://www.bosskutdiecuts.com/ 
The file name is: Tree Mistletoe Cupcakes-JS.Next up, is my turtleneck Tee-shirt, I never like the way jewels feel with turtlenecks and so, I’ve added a little sparkle and glitter right to the shirt.  For this shirt I used a couple of Bosskut’s new files:


Of course, we all need a pretty little black sweater for those chilly nights out and what better than one with a little bling added to it?


This design has a little tweaking, as I cut the pretty swirly design a bit larger then I should have.  Frugal I, decided to cut it in half and piece it like this. After looking it still needed something so I along came the bow.
                                                   
The pretty Swirl is part of the beautiful “Holly Collection”, and the bow is from the “Tree Mistletoe Cupcakes-JS.
Well, there you have it, the start to my holiday apparel collection, the first samples will be mine to enjoy, and after all, Santa did say I’ve been extra good this year. ;)

Remember, www.Bosskut.com  sells the amazing “Gazelle” die cutter, rhinestones, vinyl, mats, blades, pretty papers, rubber stamps and more.  Did I mention Copics too?
www.Bosskutdiecuts.com sells the most amazing files that cut so smooth they really make my “Gazelle” sing.   Lori m                                             


   PRINT AND CUT ORNAMENTS
By Phyllis Parkins
Mrs. Bosskut


One of my favorite holiday traditions is a special ornament for each of my girls. I did this every year while they were growing up and then when they started leaving home they each were able to take all of their special ornaments that we had been collecting over the years. I'm continuing this tradition for my grandchildren.  This year I decided to use our new improved print and cut feature to make their ornaments. I imported stamped my images and then scanned them into my Gazelle software. You can scan directly into your Gazelle software. Then I added a border around the images, put their name on the ornament,  added my crop marks, printed them, then cut them on the Gazelle and colored the images with my copics. After I made the cut line around my .jpeg stamped image I made the line color white so it would not show when I printed it. I used the outline feature to add 2 additional mats and the charm feature to the largest mat and then cut them. They were fun to make and I was so pleased with how accurate the print and cut was.
Supplies:
Stamps or digital images to scan I used La La Land and Magnolia Stamps for my images. You can find them in the craft supplies catagory at www.bosskut.com
Copic x-press paper available at www.bosskut.com
Copic markers also available at www.bosskut.com
Best Creations glitter paper available www.bosskut.com


   REINDEER GIFT BAG
By Judy Stark
Bosskut Design Team Leader

Another fast and easy project for the holidays.  I used the Bosskut Reindeer available at http://www.bosskutdiecuts.com/ and a basic bag pattern.  If you are needing bag or box patterns, look in your free Funtime software under 3d shapes.  (Blue Book)  I cut my bag 5.5" by 3.5 " and my reindeer is 2.5 " by 2 ".  Attach your reindeer to the front and add ribbon.  I used a stamp on mine for the sentiment but you could add a sticker or write with your Gazelle. Bag now ready for some Christmas treats or coal?


    PEACE and GOODWILL CARD

By Judy Stark
Bosskut Design Team Leader

This is a print and cut combo card.  I used the newly released Pinecones file available at www.bosskutdiecuts.com and made the inside frame by designing the layout and printing/cutting with my Gazelle.  This file includes a jpg, WPC, GSD, AI and you can cut it with your Gazelle, sketch it with your  pen feature on your Gazelle or as I did, print and cut.
After cutting my print and cut, I added a little more color with my Copic markers.  Chalked the edges, matted it to the background frame and added the metal flourish. 


Happy Holidays from Bosskut - Scrap-mart 2nd Annual Blog Hop -Day 1


                                                    Snowflake Ornaments
                                                                  By Phyllis Parkins
                                                                     Mrs. Bosskut


These snowflakes were so fast and easy to make and add some glitz and glitter to my Christmas tree.  I used the new snowflake design, added the charm feature in Gazelle's special effects to the top so they could be hung on my tree.  I mirrored the snowflake in our software and then cut two snowflakes out of glitter paper. Then I put Scotch adhesive dot roller on one snowflake and glued them together. I especially like the glitter paper we carry at Boss Kut because it has a coating,  is extremely sparkly and doesn't shed glitter. It cuts very well on our Gazelle with a pressure of 4 and just one pass.
Supplies
:
BKD075 Snow flake at www.bosskutdiecuts.com
Silver and Gold glitter paper at http://www.bosskut.com/glitterpaper.aspx
Adhesive dot roller or glue


                                                       LAYOUT -  I BELIEVE
                                                                By Judy Tesla Stark
                                                            Bosskut Design Team Leader


What can I say about making this page but fun,fun, and more fun!  I used the Poinsettia file at http://www.bosskutdiecuts and popped it a little. The Angel is a LaLaLand stamp, which Bosskut now has available at http://www.bosskut.com/ The paper I used is BoBunny "Walking in a White Wonderland" and I loved using these colors!  

I used my Gazelle to cut my flourish, flowers and my title.   
Happy Holidays


                                TREE  ORNAMENTS
                                                                By Debbie Grommet
                                                                Bosskut Design Team


Gathering the children and spending an afternoon making ornaments has always been one of my favorite things to do during the holiday season. These ornaments are great fun and perfect for some time with the kids. This project is also a way to use up all your old papers, you will need 2 sheets for every ornament, and you don't have to limit it to Christmas papers just use what you like. I used inspiration from a box of antique ornaments that were my Grandmas but it is exciting creating the shapes.


To Create the shape of your ornament, in you funtime software draw some ovals circles and triangles. Use the justification button to send all your shapes to the center of the page then select one of the shapes and arrow it up or down, this will keep everything in line so they are even when you make your fold, move all shapes the same way until you have them overlapping just a bit. Now select it all and weld. Surprise this is your ornaments basic shape. Draw a vertical kiss line and send it to the center of the page also re center your ornament , this will make your fold even. Group and size, I made them about 4" cut 20-24 of these for each ornament. Now it is time for the kids to help the kiss line makes folding easy, fold them along the kiss line . Make sure when you are folding that the printed side in on the inside. Glue one side of the fold to the next folded piece.keep the lined up and match until you get 20-24 glued together. To get your ribbon ready make a loop for hanging and tie a knot measure the length of the ornament and tie another small knot slide the bead up to the bottom knot and tie another small knot to keep bead in place. Open the ornament lay the ribbon in place and glue the two sides of the ornament together.

It is really exciting to see the end result.


GINGERBREAD TREE SKIRT
By Ruthanne Tucker
                                                                  Guest Designer


I love to craft and I love machine embroidery!  I got my BossKut Gazelle in September of 2011. 
 I quickly learned that I could combine all of these machines into one hobby.  When I saw the BossKut Gazelle cut fabric, I was in love.
This Christmas, I was in need of a new tree skirt and I always wanted a handmade one.  I picked up a pattern just for the shape.  I thought , since my family has grown this year and I am now a Grandma, it would be nice to create a family tree skirt
                              
 I sewed the tree skirt per instructions and created an embroidery applique design and used my favorite software; make the cut to create the gingerbread cut out.  Using the Gazelle was very simple: all I had to do was fuse heat and bond fusible lite to the back of the fabric, place it on the mat and click cut.  I then attached each gingerbread applique to the skirt and embroidered each family member’s name.

Ruthanne Tucker


                                                      Poinsettia Wreath
                                                                  By Lori m.
                                                           Bosskut Design Team 

Simple, quick, and pretty” Poinsettia Wreath” using www.bosskutdiecuts.com’s amazing file and my wonder machine and pretty in pink Gazelle!


Recipe:
1. My Bosskut Gazelle for the file cutting
2. Bosskutdiecuts.com # 0576 poinsettia file
3. Bosskut.com # 0185 heat transfer red glitter vinyl
4. One wreath
5. On hand leather texture paper used for poinsettias 
6. Scrap piece of green, ivory and red ribbon, along with some red taffeta. 
7. Glue and glue dots
8. A few silk flowers Mod Podged with pearl centers 

           Look how nicely my Gazelle cut the iron on vinyl!
There you have it, one pretty and easy holiday wreath, enjoy.


 The pointsettias and holly leaves are files from www.bosskutdiecuts.com. I'm just having way to much fun again. I need to find my wreath door hanger and take a better wreath photo, the poinsettias were cut out of a suede paper and the Merry Christmas red glitter heat vinyl is from www.bosskut.com.
                                                  

 Happy Holidays,  Lori m


I will say Bosskut has the best vinyl, both, for walls and heat vinyl  


                                                           Tapestry Banner
                                                                    By Linn Cole
                                                              Bosskut  Design Team   
       
Today I decided to make what I call a Tapestry of Paper instead of using fabric!  I used the Vintage Framette from Karen Taglia,and cut out 6 of green card stock, made 6 mats from red card stock, then cut out 2" letters that say J-O-Y to the World in Design Paper, cut some more snowflakes this time using Snowflake by Phyllis Parkins instead of the #2 Snowflake by Phyllis Parkins. And last I used some Gold Ribbon to hang my Tapestries on by placing the ribbon on top of the green Vintage Framette then adding the mat over the ribbon and then adding the letters and embellishments last!  Make sure to make a loop at the top of the ribbon so you can hang your lovely 'Paper Tapestry' on the door or wall or in a window for the Holidays!  Check out http://www.bosskutdiecuts.com/ and the Bosskut Store for ideas for the Holidays!


                                              Stocking Gift Card Boxes
                                                                 By Katie Piotrowski
                                                                Bosskut Design Team


My two oldest are getting to where they want money and gift cards for Christmas.  As a mommy, I sometimes struggle with this because I feel like I should find them something great, just for them, that they'll enjoy.  But, this year, I figured if that's what they want that's what I should give them.  I CAN personalize the packaging though, which makes me feel a little better.  ;)
I picked them each up an iTunes gift card.  The cards are taller than regular credit card sized gift cards so a simple gift card envelope wouldn't work.  I decided to make them little gift card boxes...


  My Gazelle, of course, was my go to tool for this project!  I used the Holly Stocking, enlarged it to the size I needed, duplicated the shape then mirrored one of them.  That way I have a front and a back.  After cutting the stocking pieces, I created a spine by simply cutting an 8.5" x 2" strip of cardstock and scoring 1/2" on either long side.  Then all I had to do was snip little "v's" so that the strip would bend without cracking.  I glued the strip to both stocking pieces and added the tops.  To personalize them, I cut a monogram letter and little hollys from the Holly Stocking and added them to a burlap heart.  I am thinking I *might* be able to reuse the boxes (if my kids don't destroy them) so instead of gluing the hearts on, I used a mini clothes pin to pin the hearts to the boxes.  Then, I added a bit of cord to the spine of the box to create a little hanger.  The burlap heart, mini clothes pin and cord are products from Canvas Corp.  Here's a pic of the inside of the box...
So I can add the gift cards and tuck a little tissue paper in there and I'm good to go.  These were super easy to create and you could have them whipped up in no time!  This design is also great for assembly line projects so if you have more than one you need, you can do all your cutting first then assemble!

Link list: 
http://canvascorp.com/blog/


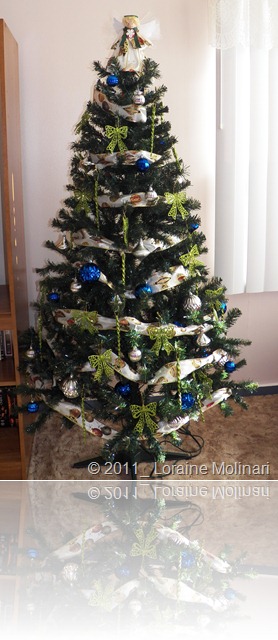
TREE TOP ANGEL

By Lori m.
 

Today came my new order from Bosskut. I had more request for Tee's from our daughter's friends with little ones as the designs stay on, even with all the washing's.

Phyllis and John, thank you for quality products and prompt deliveries. Terri, thank you for above and beyond Tech support!

Ok now on to the angel, I made it from a pattern I found last year some place and then added the rest on top of it. But,.... I'm guessing tomorrow she'll be testing her wings when our grandson and daughter see her.
Happy Holidays count down everyone, Lori m


Friday, December 2, 2011

Win a BOSSKUT GAZELLE - Scrap-Mart's 2nd Annual Blog Hop

                                                 
                                     Scrap-Mart's 

                             Holiday Blog Hop   

                                    
The  hop will take place beginning Monday, Dec. 5th and will continue through Saturday, Dec. 10th. The following manufacturers are participating... BossKut, OctoberAfternoon, The Rubber CafĂ©, Canvas Corp, Heartfelt Creations,Want2Scrap,LaLa Land Crafts, Sizzix, Just Rite Stampers. Each manufacturer will be giving out prizes along the way as well so there are tons of chances to win some new goodies


                                 Enter the DRAWING for a GAZELLE  
                                                   (no purchase necessary) plus our daily drawings.
                                                                  
To be eligible for the drawing for the Gazelle,
 You need to post each day at least one comment on the Bosskut Blog, Scrap-Mart, and like us on our Facebook page. Links will be provided for you. The more you comment, the more chances you will have! Winners will be posted on Scrap-Mart and BossKut December 12th. 1 week to claim your prize or it is void.

            We will post NEW projects by our Design Team and guests each day.

Daily Drawings-
Monday- Bundle of 5 Dies Tuesday- $15 Gift Certificate for Bosskutdiecuts.com
Wednesday- Florette & Framette CD Thursday- $15 Gift Certificate for Bosskutdiecuts.com Friday- Bundle of 5 dies Saturday- $15 Gift Certificate for Bosskutdiecuts.com -

Winners will be posted Monday, December 12, 2011 on the Bosskut and Scrap-Mart sites.

                The hop will begin Monday on the Scrap-Mart  blog at 9 am CST!