Monday, April 29, 2013

Butterflies by Lori m


I saw these two ideas on Pinterest and knew I had to give them a try.


First is my butterfly garden;
For this I used butterfly files from www.bosskutdiecuts.com.


The jar is a recycled sauce jar, I used flower soft to cover up my glued bottom and added in a few extra coiled wire pieces, a little glossy accents and glitter to the butterflies, then a couple wooden pieces on top painted and finished.
Simple, pretty and it finished off  my shelf/ mantel nicely

Friday, April 26, 2013

Breathe Sign by Lori m

By Lori m


Looking around my craft room, I found a little nook needing something special.  This is a spot within my view.

 Have you ever been rushed to finish a crafting project? I don’t know if you’re like me, but that’s when anything and everything tends to go wrong.  So, I made myself a pretty little sign to remind me, that I need to “Breathe, Just Breathe”!

For the sign I used one of those inexpensive framed canvases and some other goodies.

My Gazelle did wonderful at cutting out the thin text for my sign, then using one of new files from www.bosskutdiecuts.com’s designer Judy Stark, 3D Flower Pot #file, and a few others I came up with this wall keepsake.


Files can be found at www.bosskutdiecuts.com.


I hope you like it?  Enjoy!

Wednesday, April 24, 2013

Cherish Card by Kenya G


Hello Gazelle lovers,
Here is a simple card that can be used for a Mother's Day, wedding or an anniversary. For this card, I used the Lace Border and the Floral Doily. Both files can add a delicate touch to your project.
This is a standard A2 sized card. I welded the Lace Border to the bottom of the card base which was designed in the software. I backed the border with the same pattern paper as the matting. I also used gross grain ribbon the card.
I used the shadow of the Floral Doily for the focal point. I fussy cut the dress from a designer paper by Webster's Pages. I used faux pearls to lightly embellish. I also used a cutout from the designer paper for the sentiment.

On the inside of the card, I used the negative of the doily cut and used distress ink to add a design element to the card. I also used a scrap piece of the pattern paper to bring the decretive element to the inside as well.
I hope you enjoyed today's project. Remember to stop by bosskut.com for files, supplies and inspiration. Kenya~

Files

Sunday, April 21, 2013

Mother's Day Book by Judy Stark


This is one of the new designs just released: Lacey Booklet.  It is a quick gift to make for the upcoming Mother's Day.  The book has 6 pages but extra pages can be added easily if needed. Available at www.bosskutdiecuts.com

  I let my paper chosen accent this book.  Meaning, I only needed to cut the design, chalk the edges and add a ribbon.  I also added pearls onto the cover page.  With busy paper being used, I did not want to overpower the look by adding too much more.  One of the features of my cutter Bosskut Gazelle is the ability to move the plotter head to anywhere on the paper and it will start cutting there.  The butterfly and rose was in the center of my 12 by 12 page and I was able to cut it for the cover page of my book.

This design also has frames and a border to complete your pages with. 

Judy Stark

Tuesday, April 16, 2013

Tissue Box by Lori m.

Tissue Box

By Lori m

I’ve decided to keep my craft room main theme of Pinks and Greens. With that in mind, a store box of tissues just didn’t fit in, it look so out of place.

My solution, bling it baby, bling, rhinestones and pretty flowers sure make a huge difference in appearance.


Here….you can see for yourself, I’m pretty happy with the final look thanks to some amazing files that cut like butter from www.bosskutdiecuts.com and my pretty in pink Gazelle.

So do you agree with me, much prettier than a store bought box right?

I do love pretty flowers, Popkut and those cute little bugs.

Lori m.

Saturday, April 13, 2013

Cute Darling Baby Card by Kenya G


Hello Gazelle Lovers,
Kenya here to share an adorable baby card with you. I don't know about you, but spring equates to baby announcements like no other time of year for me! I know at least four people who are due this summer! I guess I know what I will be doing! This is a 6x6" card which is not a typical size for me. However, babies are special so I had to do something differently.
 For this card, I used the banner, bottle and rattle. I am pleased with how well the detail cut on the Gazelle despite the size. I mean the cuts are approximately 1" so that makes the detailed cuts less than an eighth of an inch! Take it slow and easy. I did a speed of 2 since it was more detailed. Although the speed is slower, I am always amazed at how fast slow is! If you are new to the Gazelle but not electronic cutters, you will know what I mean ;) and you too will not believe your project cut so quickly; even on low!

I do have a small vent and warning. Look twice and stamp once! Ok, I used a set of stamps that I have not used in over a year. I couldn't remember why it has been so long since I used the set until I was in too deep. I had already stamped the C, U and T so when it was time to stamp the E, I realized the rubber had fell off the wood mount. I searched frantically to no avail. I had to make a decision. Either I scrapped the banner idea or I had to get creative. I went with the latter. I searched all of my stamps to find a similar style font. It is not a perfect match. However, I had to do what I had to do! Hey, what can I say? Crafters are just that; CRAFTY!! Remember to check your stamps BEFORE you begin stamping


To finish embellishing the card, I cut the image from the paper collection. I also added a doily to fill in the card. I also stamped the little foot print and added Glass Effects to give it a button effect without the added bulk.
I hope you enjoyed today's project. Don't forget to stop by bosskutdiecuts.com for more files, supplies and inspiration. Kenya
Files:


Tuesday, April 9, 2013

Japan File Folder Keepsake by Jamie G


Files Used: Branch 0988, Fifties Flower 0504, Hibiscus paper piecing 0390,
Materials: File folder, card stock, embellishments, ribbon

In February my dearest hubby and I went to Okinawa, Japan. We visited with my brother, who is currently stationed there, and his wonderful family. We had such a great time and came back with so many memories. We also came back with plenty of souvenirs that now need a good home.

I started out with folding a manila file folder and then inked the edges.

Then I printed out a world map and used a tea bag to give the map an aged look. After applying the map to the file folder, I threaded some red embroidery thread to created the dotted line from the United States to Japan.

I attached a piece of ribbon on the back to tie the folder shut. Then using different designer card stock, I decorated each of the remaining sections.

The flowers were absolutely beautiful in Japan while we were there. The front of the folder was inspired by the cherry blossoms that were in bloom while we were there. Using the Fifties Flower 0504 and the branch I decorated the front fold of the file folder.

Each of the fifties flowers that were cut were a little over a quarter of an inch! My Gazelle did a beautiful job cutting each of them out.

Using my stylus, I went in circle in the center of the flower to get the flower to fold toward in. Then I inked each flower to give them a realistic feel. I just love how my cherry blossom tree turned out that I'm sure to use it again!


Below is a picture of the file folder opened up. Each pocket is going to hold our receipts, pamphlets, and other goodies from our trip.


I chose to use the Hibiscus paper piecing 0390 because it reminded me of one of my favorite pictures that I took. I cut out 2 of the larger pieces so that I could put in the additional layer. I inked the center red so that it would like the yellow faded into the red.


Jamie GillahanBossKut Design Team Member
My Crafting Blog

For more projects and information, please click links below:
BossKut Company Blog
 

Saturday, April 6, 2013

Butterfly Invitation by Kenya G


Spring is finally in the air...well somewhat! Although the weather is not fully cooperating, it is not stopping spring party plans and engagements!
Today I am sharing one of the simplest invitations ever! These can be massed produced in no time! If you have been a follower of mine, you know I like to use the library and simple shapes that come FREE with your Gazelle 
 

For the card, I welded simple shapes together. I also love butterflies! What a perfect marriage! I used the PopKut Butterfly as the focal point on this card. What I really like is I get a lot of dimension without all of the extra bulk. Not to mention  how well they cut on the Gazelle. The butterfly on the card is less than an inch!

On the inside, I used the second butterfly that comes in the PopKut Butterfly with this design. It is a great way to tie the front of the card with the inside. To finish off the card, I added a few faux pearls.

That is it! I know this was very simple, but I hope you enjoyed today's project! Don't forget to visit BossKut for files, supplies and inspiration! Kenya~

Files:

Tuesday, April 2, 2013

30th Birthday Bouquet by Lori m

I made this bouquet for our daughter’s friend for her 30th Birthday.  This was a challenge for me but fun in the making.

Using a few amazing diecuts from www.bosskutdiecuts.com, a little imagination, and a few other files, here’s my completed my arrangement.

The files I used from www.bosskutdiecuts.com;

1. Pitcher with lemon by Judy Stark # BKD118

30 Dum Dum suckers
Vase on sale at Michaels
1 Square foam piece
Ribbon on sale at Michaels

Enjoy!


Wednesday, March 27, 2013

Easter Brownies using Bosskut Gazelle by Jamie G.


Files Used: Butterfly Egg 0638, Cross by Karen Taglia 0344, Easter Egg with Cross 0640, Lattice Egg BKD 004, Ornamental Egg 0639,
Materials: Card stock, yummy delicious brownies, confectioner sugar

Add a Boss Kut die cut to a mocha brownie and it just doesn't get any better than that!! Beautiful and delicious all-in-one. :o)

I started out with getting my brownie batter mixed and in the oven. Once that was baking, I got out my egg shaped cookie cutter and measure it so that I knew how wide to make the die cuts.


I selected various Boss Kut Die Cuts and cut them out on some scrap paper that I had. The Gazelle was much faster at getting this part done then the oven did at getting the brownies baked! :o)


With the brownies done and cooled off, I cut out the egg shapes with the cookie cutter. I placed my egg shaped brownies on some wax paper and laid the die cuts on top of them. With a shifter, I put some confectioner sugar on top.


Carefully I lifted the die cuts off of the brownies and set them off to the side. While I did have some of a disagreement with some of the sugar, for the most part I'm really happy with how they turned out!! Super cute and yummy!!

This fun little project took little time and was VERY easy! Got me to thinking about what you might be able to do with a cake, or a cookie cake. Maybe use the negative of a cut to create the outline to follow with pipe frosting or gel . . . . hmmmmmm. ;o)

Jamie Gillahan – BossKut Design Team Member
My Crafting Blog
 

Sunday, March 24, 2013

Easter Baskets and Boxes by Judy Stark


Is it just me or does the Holidays seem to come quicker than other days?  I am making a few last minute
projects for our Easter baskets and boxes for gift giving. 

The box on the left side of the picture above was made using the Sitting Bunny Set available at Bosskut.  I also used  the Popkut Grass design.  All of our designs are created for computerized digital cutters. The digital downloads contain all of the following formats: AI, WPC, GSD, Vector PDF and a jpg for reference. FYI: Bosskut also sells dies at a very reasonable price at www.bosskut.com  The box on the right, I used a soon to be released 3D FLower Pot and the Spring flower.  When I design a pattern, I try to keep the cutting to a minimum and add as much extra details possible. Nothing is more frustrating to me to buy a design and have way to many pieces to glue together! 


I am making baskets for my Grandchildren this year and fill with candy.  I designed this Basket Favor Box with them in mind.  It's also a good pattern to use without the handle for parties.  Soon to be released.


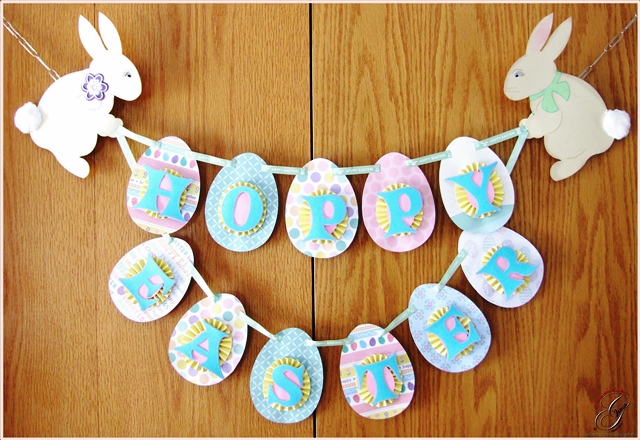
Thank you for stopping by and Happy Easter !
 
Judy Stark - Bosskut Design Team


Friday, March 22, 2013

Easter Baskets by Lori m


Quick, easy, and I made 24 of these cute little Easter Baskets for our grandson’s daycare party.

Starting with a plain plastic cup, I punched two 3/16” holes to thread the ribbon through for a handle.

Next, I added a little bit of the Easter basket grass from the dollar store, and finished with a tag and two cute diecuts.

The Bunny is one from the new release, Bunny Set by Judy Stark.


For the tag, I used a pen in my Gazelle for the text, and  cut out the design.

 So quick, so easy and fun!

Files used from www.bosskutdiecuts.com;


Happy Crafting!
Lori m

Wednesday, March 20, 2013

Hoppy Easter Banner by Jamie G


Files Used: Sitting Bunny Set by Judy Stark BKD 175, Egg Blank 0642
Materials: Card stock, goggle eyes, self adhesive pearls, cotton balls

Hippity hoppity Easter's on it's way! With Easter just around the corner, we're getting the house decorated accordingly and the only thing missing was a banner. With some help from the adorable files available at Boss Kut Die Cuts I was able to create a cute banner that my children love!

Using the Egg Blank 0642 I started by adding 2 cut lines at the top. I added an eighth of an inch longer than the width of my ribbon so that it would be easier to thread the ribbon through. I then cut out 11 of the eggs in various different papers.

I created the rosette using a piece of yellow card stock that measured 1" x 12". I scored the strip of paper every 1/2" then flipped the paper upside down and scored every 1/4". I wanted my rosette to have a egg shape, so I cut out an additional 11 eggs out of pink card stock. I shaped my rosette to the egg as I glued them together.

I cut out the sentiment "HOPPY EASTER" using the true type font Crazy Harold. To give the sentiment a little more pop and dimensions, I added an outline and cut that out in a different color.


For my 2 adorable Sitting Bunny Set by Judy Stark BKD 175, I cut each out in a different shade of natural color and inked the edges. For the cut lines in the bunny, I traced them with a VersaMarker to help the details stand out. I inked the "inside" of the ear and the cute little nose with pink.


For the eyes, I used a black extra fine pen to create eye lashes and to highlight the eyebrow. To give the eyes additional dimension, I used a piece of white card stock and glued on a goggle eye. For the inset look of the eye, I took the piece of white card stock with the goggle eye and added it to the back of the bunny using pop dots.


For each of the bunnies, I added a ribbon around their necks and inked the edges. With my adorable girl bunny, I also added the beautiful flower that comes with the cut file. I also added some self adhesive pearl embellishments.

Please don't forget to show off your beautiful projects in the Boss Kut Forum and/or the Boss Kut Facebook page! We'd LOVE to see what you've been creating!!

Jamie Gillahan – BossKut Design Team Member
My Crafting Blog

For more projects and information, please click links below:
BossKut Company Blog

Monday, March 18, 2013

Spring Bunny by Lori m.

Spring Bunny
By Lori m

While strolling through Michael’s the other day, I noticed one of those cute little Bird Cages on clearance, so I bought it.

It looks nice just being the coated white wire with a flameless candle in it but, I decided to have a little fun with it.

I will say, my pretty in pink Gazelle was very busy today cutting away all the amazing files. I do love those Pop Kuts files from www.bosskutdiecuts.com, and every Bunny deserves his or her own little flower garden to enjoy!


The bottom of the Bird Cage is filled with the pretty iridescent glass marbles and the outer edges consist of ribbon, grass, the beautiful border.

 Each file has been cut and colored or the edges inked, and I added glossy accents along with a few pearls in the flowers centers.

This pretty Easter arrangement is now on display on our living room shelf awaiting a few more decorated goodies.   

3. Ruffled Butterfly #BKD105 by Judy Stark
5. Flourish2  #0981 by Phyllis Parkins
7. PK Grass  #BKD095 by Judy Stark
8. Lace Borders #BKD032 by Judy Stark

All the files used can be found at www.bosskutdiecuts.com.

Enjoy!
Lori m

Sunday, March 17, 2013

My Little Leprechaun by Lori m


This little guy always makes us happy, our grandson Noah whom granny turned into a little leprechaun sitting in a pot of gold.

Using my Gazelle Funtime program I made a print and cut file. Next I cut strips of paper to cover raison boxes and embossed them. These will be his daycare St. Patrick treats.

The finished look, priceless, well to me it is. 
I just want to pinch those little cheeks for lucky!

Enjoy, Happy St. Patrick’s Day!

Lori m.

Friday, March 15, 2013

Happy Easter by Kenya G


Hello Gazelle Lovers,
Easter is at the end of the month. Can you believe it? For me Easter truly marks spring. In light of the holiday and to make it kid friendly, I decided to make a little treat bag.
On this project, I used the Scalloped PK Bag. It comes with a Pop Kut attached to the bag. However, I used a PopKut Flower in a different pattern to place on top.
To embellish the bag, I used the PopKut Grass Border on the bottom. I fussy cut the bunny, flowers and chevron border from a paper collection.  I added a sentiment with a stamp in my stash.
For the inside, I cut some thin strips of scrap paper. I ran them through the corrugator and placed them inside. I cut some of the ends in a diagonal to make them look more like grass.


I hope you enjoyed today’s project. Remember to stop by Bosskut.com for more files, supplies and inspiration! Thanks for stopping by, Kenya~
Files:

Tuesday, March 12, 2013

Bible Easel Card by Jamie G


Files Used: Cross by Karen Taglia 0344, Dove with Scroll by Karen Taglia 0397, Open book available in the Bluebook in Funtime
Materials: Card stock, black glitter heat transfer vinyl, ribbon

I started with using the book cutting file available in the Funtime Blue Book minus the actual pages that I needed for the book. Don't forget to check out all those cut files that came with your Gazelle!!

The reason for not cutting out the pages yet is because I wanted to give my book a dimensional look and decided that adding more pages would help to achieve that. Using a fantastic new feature in the Funtime IV software, I was able to increase the size of the pages by percentage!! For this particular application, it makes it so much easier because the 2 pages of the book that I'm dealing with are different sizes by an odd number.

I re sized my book to 5 X 7 by using the Condense option in the Transformation box. Fortunately with this particular cut file, by condensing it instead of maintaining the ratio it didn't noticeably distort the image. I simply chose to do this because it made it easier to assemble a A7 envelope for mailing instead of creating a whole new envelope. :o)

Now that my book is the size I'd like, I select the image and at the top under Shape, select Break all. This gives me the ability to select the individual pages. I chose to make a total of 4 pages (for each side) for my book. Selecting each of the pages, make an additional 3 copies.

There was no magic in deciding the sizes of each of the layered pages. I just picked a percentage I thought that work well and went with it. So, keeping that in mind the top page will remain the size that was created when I condensed my whole book to 5 X 7. Each page after increases by 2.5%.


At this point you will definitely need the transformation box up and have either the Width or Height selected. Select the second page, in the transformation box I selected Width, then click on the box next to the percentage sign. Next to the W.: type in 102.5 and hit the Apply button. You'll notice that once you've selected Apply, the numbers in the boxes will revert back to the measurements instead of the percentage

The third page I increased by 105% and the final was increased by 107.5%.

I cut out the 2nd, 3rd, and 4th pages and shaded them with some ink. For the first page I typed out and printed some of the NIV Bible from Mark 16 onto the top pages and cut out the pages around it. I also added some ink to the edges of the first page.

For the place marker ribbon, I ironed on "He is Risen" using the beautiful black glitter heat transfer vinyl. Using the video by Terri, Vertical Text, I typed out the sentiment vertically, spaced it to my liking, and then centered it. Remember when you are working with heat transfer vinyl to cut the vinyl and NOT the backing. When you go into the cut menu, make sure to "Mirror" your sentiment and "Weed" it.

To hold up my book I took 2 of the Dove with Scroll by Karen Taglia 0397 and welded them together. I glued down the scroll to the base of the card and scored the doves so that they would stand up, supporting the book.


I cut the scrolls out in 110 lb card stock, which by the way my Gazelle cut out beautifully!! Check out those clean cuts. Using several different colors of ink pads, I dabbed the scroll to give it a speckled look.

Using the same technique with the inking, I inked the Cross by Karen Taglia 0344 and applied a self adhesive maroon pearl to the center


I hope that this project has inspired you to create something beautiful with the Boss Kut Designs and to check out the wonder new features available with Funtime IV!

Jamie GillahanBossKut Design Team Member
My Crafting Blog

For more projects and information, please click links below:
BossKut Company Blog