
Snowflake Ornaments
By Phyllis Parkins
By Phyllis Parkins
Mrs. Bosskut
These snowflakes were so fast and easy to make and add some glitz and glitter to my Christmas tree. I used the new snowflake design, added the charm feature in Gazelle's special effects to the top so they could be hung on my tree. I mirrored the snowflake in our software and then cut two snowflakes out of glitter paper. Then I put Scotch adhesive dot roller on one snowflake and glued them together. I especially like the glitter paper we carry at Boss Kut because it has a coating, is extremely sparkly and doesn't shed glitter. It cuts very well on our Gazelle with a pressure of 4 and just one pass.
Supplies
:
:
BKD075 Snow flake at www.bosskutdiecuts.com
Silver and Gold glitter paper at http://www.bosskut.com/glitterpaper.aspx
Adhesive dot roller or glue

LAYOUT - I BELIEVE
By Judy Tesla Stark
Bosskut Design Team Leader
What can I say about making this page but fun,fun, and more fun! I used the Poinsettia file at http://www.bosskutdiecuts and popped it a little. The Angel is a LaLaLand stamp, which Bosskut now has available at http://www.bosskut.com/ The paper I used is BoBunny "Walking in a White Wonderland" and I loved using these colors!
I used my Gazelle to cut my flourish, flowers and my title.
I used my Gazelle to cut my flourish, flowers and my title.
Happy Holidays

TREE ORNAMENTS
By Debbie Grommet
Bosskut Design Team
Gathering the children and spending an afternoon making ornaments has always been one of my favorite things to do during the holiday season. These ornaments are great fun and perfect for some time with the kids. This project is also a way to use up all your old papers, you will need 2 sheets for every ornament, and you don't have to limit it to Christmas papers just use what you like. I used inspiration from a box of antique ornaments that were my Grandmas but it is exciting creating the shapes.

 To Create the shape of your ornament, in you funtime software draw some ovals circles and triangles. Use the justification button to send all your shapes to the center of the page then select one of the shapes and arrow it up or down, this will keep everything in line so they are even when you make your fold, move all shapes the same way until you have them overlapping just a bit. Now select it all and weld. Surprise this is your ornaments basic shape. Draw a vertical kiss line and send it to the center of the page also re center your ornament , this will make your fold even. Group and size, I made them about 4" cut 20-24 of these for each ornament. Now it is time for the kids to help the kiss line makes folding easy, fold them along the kiss line . Make sure when you are folding that the printed side in on the inside. Glue one side of the fold to the next folded piece.keep the lined up and match until you get 20-24 glued together. To get your ribbon ready make a loop for hanging and tie a knot measure the length of the ornament and tie another small knot slide the bead up to the bottom knot and tie another small knot to keep bead in place. Open the ornament lay the ribbon in place and glue the two sides of the ornament together.
It is really exciting to see the end result.


It is really exciting to see the end result.

GINGERBREAD TREE SKIRT
By Ruthanne Tucker
Guest DesignerI love to craft and I love machine embroidery! I got my BossKut Gazelle in September of 2011.
I quickly learned that I could combine all of these machines into one hobby. When I saw the BossKut Gazelle cut fabric, I was in love.
This Christmas, I was in need of a new tree skirt and I always wanted a handmade one. I picked up a pattern just for the shape. I thought , since my family has grown this year and I am now a Grandma, it would be nice to create a family tree skirt.

I sewed the tree skirt per instructions and created an embroidery applique design and used my favorite software; make the cut to create the gingerbread cut out. Using the Gazelle was very simple: all I had to do was fuse heat and bond fusible lite to the back of the fabric, place it on the mat and click cut. I then attached each gingerbread applique to the skirt and embroidered each family member’s name.
Ruthanne Tucker

Poinsettia Wreath
By Lori m.
Bosskut Design Team
By Lori m.
Bosskut Design Team
Simple, quick, and pretty” Poinsettia Wreath” using www.bosskutdiecuts.com’s amazing file and my wonder machine and pretty in pink Gazelle!

Recipe:
1. My Bosskut Gazelle for the file cutting
2. Bosskutdiecuts.com # 0576 poinsettia file
3. Bosskut.com # 0185 heat transfer red glitter vinyl
4. One wreath
5. On hand leather texture paper used for poinsettias
6. Scrap piece of green, ivory and red ribbon, along with some red taffeta.
7. Glue and glue dots
8. A few silk flowers Mod Podged with pearl centers

Look how nicely my Gazelle cut the iron on vinyl!
There you have it, one pretty and easy holiday wreath, enjoy.
The pointsettias and holly leaves are files from www.bosskutdiecuts.com. I'm just having way to much fun again. I need to find my wreath door hanger and take a better wreath photo, the poinsettias were cut out of a suede paper and the Merry Christmas red glitter heat vinyl is from www.bosskut.com.
Happy Holidays, Lori m
I will say Bosskut has the best vinyl, both, for walls and heat vinyl

By Linn Cole
Bosskut Design Team
Today I decided to make what I call a Tapestry of Paper instead of using fabric! I used the Vintage Framette from Karen Taglia,and cut out 6 of green card stock, made 6 mats from red card stock, then cut out 2" letters that say J-O-Y to the World in Design Paper, cut some more snowflakes this time using Snowflake by Phyllis Parkins instead of the #2 Snowflake by Phyllis Parkins. And last I used some Gold Ribbon to hang my Tapestries on by placing the ribbon on top of the green Vintage Framette then adding the mat over the ribbon and then adding the letters and embellishments last! Make sure to make a loop at the top of the ribbon so you can hang your lovely 'Paper Tapestry' on the door or wall or in a window for the Holidays! Check out http://www.bosskutdiecuts.com/ and the Bosskut Store for ideas for the Holidays!

Stocking Gift Card Boxes
By Katie Piotrowski
Bosskut Design Team
My two oldest are getting to where they want money and gift cards for Christmas. As a mommy, I sometimes struggle with this because I feel like I should find them something great, just for them, that they'll enjoy. But, this year, I figured if that's what they want that's what I should give them. I CAN personalize the packaging though, which makes me feel a little better. ;)
I picked them each up an iTunes gift card. The cards are taller than regular credit card sized gift cards so a simple gift card envelope wouldn't work. I decided to make them little gift card boxes...
 My Gazelle, of course, was my go to tool for this project! I used the Holly Stocking, enlarged it to the size I needed, duplicated the shape then mirrored one of them. That way I have a front and a back. After cutting the stocking pieces, I created a spine by simply cutting an 8.5" x 2" strip of cardstock and scoring 1/2" on either long side. Then all I had to do was snip little "v's" so that the strip would bend without cracking. I glued the strip to both stocking pieces and added the tops. To personalize them, I cut a monogram letter and little hollys from the Holly Stocking and added them to a burlap heart. I am thinking I *might* be able to reuse the boxes (if my kids don't destroy them) so instead of gluing the hearts on, I used a mini clothes pin to pin the hearts to the boxes. Then, I added a bit of cord to the spine of the box to create a little hanger. The burlap heart, mini clothes pin and cord are products from Canvas Corp. Here's a pic of the inside of the box...
So I can add the gift cards and tuck a little tissue paper in there and I'm good to go. These were super easy to create and you could have them whipped up in no time! This design is also great for assembly line projects so if you have more than one you need, you can do all your cutting first then assemble!
Link list:
http://canvascorp.com/blog/

Today came my new order from Bosskut. I had more request for Tee's from our daughter's friends with little ones as the designs stay on, even with all the washing's.
Phyllis and John, thank you for quality products and prompt deliveries. Terri, thank you for above and beyond Tech support!
Ok now on to the angel, I made it from a pattern I found last year some place and then added the rest on top of it. But,.... I'm guessing tomorrow she'll be testing her wings when our grandson and daughter see her.
Happy Holidays count down everyone, Lori m


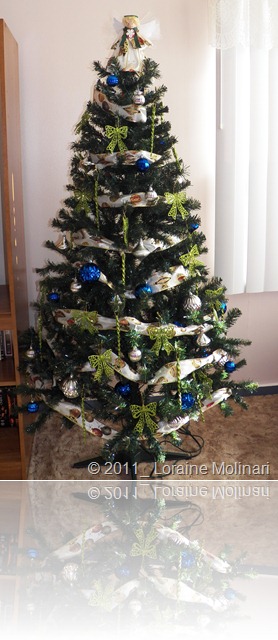
TREE TOP ANGEL
By Lori m.
Phyllis and John, thank you for quality products and prompt deliveries. Terri, thank you for above and beyond Tech support!
Ok now on to the angel, I made it from a pattern I found last year some place and then added the rest on top of it. But,.... I'm guessing tomorrow she'll be testing her wings when our grandson and daughter see her.
Happy Holidays count down everyone, Lori m
No comments:
Post a Comment