Files Used: Sitting Bunny Set by Judy Stark BKD 175, Egg Blank 0642
Materials: Card stock, goggle eyes, self adhesive pearls, cotton balls
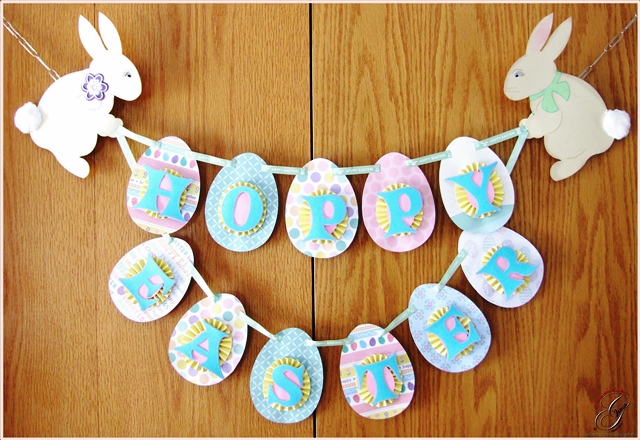
Hippity hoppity Easter's on it's way! With Easter just around the corner, we're getting the house decorated accordingly and the only thing missing was a banner. With some help from the adorable files available at Boss Kut Die Cuts I was able to create a cute banner that my children love!
Using the Egg Blank 0642 I started by adding 2 cut lines at the top. I added an eighth of an inch longer than the width of my ribbon so that it would be easier to thread the ribbon through. I then cut out 11 of the eggs in various different papers.
I created the rosette using a piece of yellow card stock that measured 1" x 12". I scored the strip of paper every 1/2" then flipped the paper upside down and scored every 1/4". I wanted my rosette to have a egg shape, so I cut out an additional 11 eggs out of pink card stock. I shaped my rosette to the egg as I glued them together.
I cut out the sentiment "HOPPY EASTER" using the true type font Crazy Harold. To give the sentiment a little more pop and dimensions, I added an outline and cut that out in a different color.

For my 2 adorable Sitting Bunny Set by Judy Stark BKD 175, I cut each out in a different shade of natural color and inked the edges. For the cut lines in the bunny, I traced them with a VersaMarker to help the details stand out. I inked the "inside" of the ear and the cute little nose with pink.


For each of the bunnies, I added a ribbon around their necks and inked the edges. With my adorable girl bunny, I also added the beautiful flower that comes with the cut file. I also added some self adhesive pearl embellishments.
Please don't forget to show off your beautiful projects in the Boss Kut Forum and/or the Boss Kut Facebook page! We'd LOVE to see what you've been creating!!
Jamie Gillahan – BossKut Design Team Member
My Crafting Blog
For more projects and information, please click links below:
BossKut Company Blog
No comments:
Post a Comment